Placing and filling a T-liner: A step-by-step guide

The T-Liner features a central filling design that enables automatic liner unfolding while eliminating trapped air, ensuring fast, efficient, and reliable filling operations. We walk through the entire process of placing and filling a T-liner.

Watch instruction video

Placing & filling procedure

A T-liner is used to transport liquid or paste-like products hygienically and efficiently inside an IBC container (Intermediate Bulk Container). Because the liner needs to be positioned correctly before the filling process can start, it’s important to follow the right sequence. Below, we walk through the entire process step by step, from placing the empty liner to a fully filled container.
Step-by-step process

Step 01

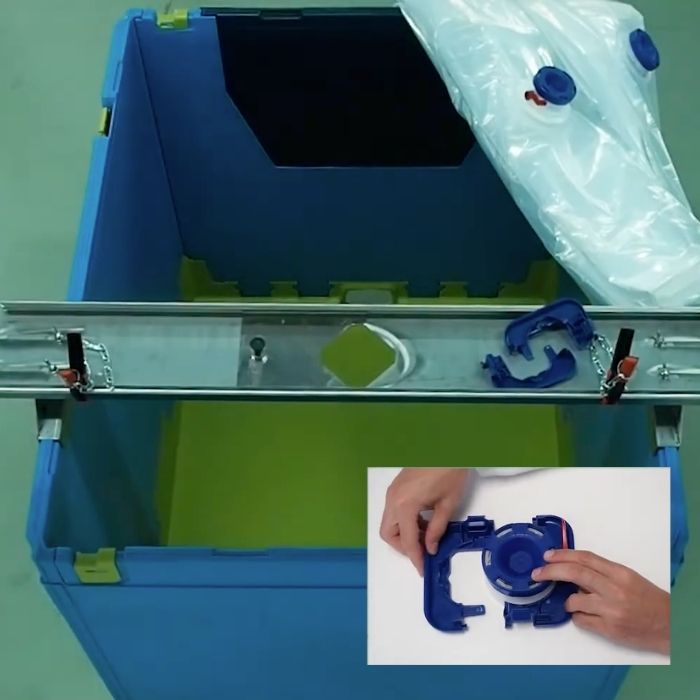
Place the blue fix clip around the valve

Before the liner goes into the container, the blue fix clip is first placed around the valve. This clip ensures that the liner stays in the correct position later during filling.

Check clip

Make sure the clip sits firmly and straight around the valve, so it can later click properly into place in the container.

Step 02

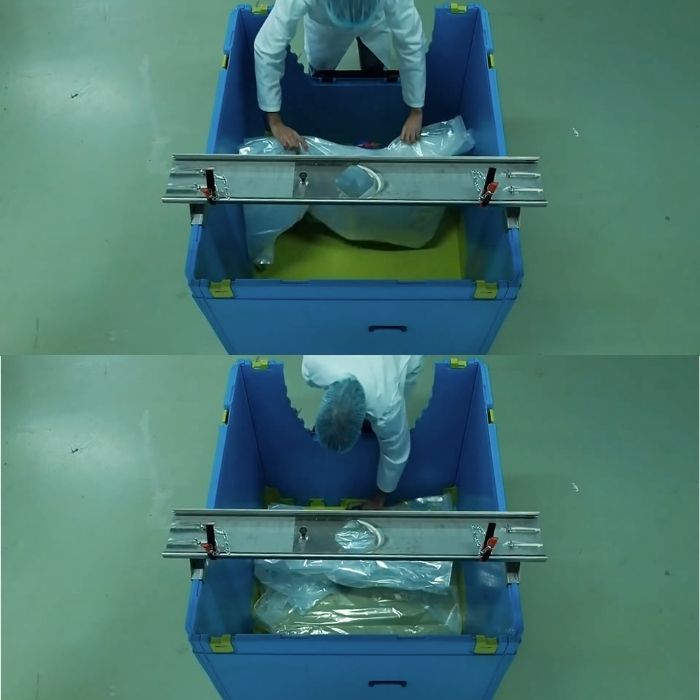
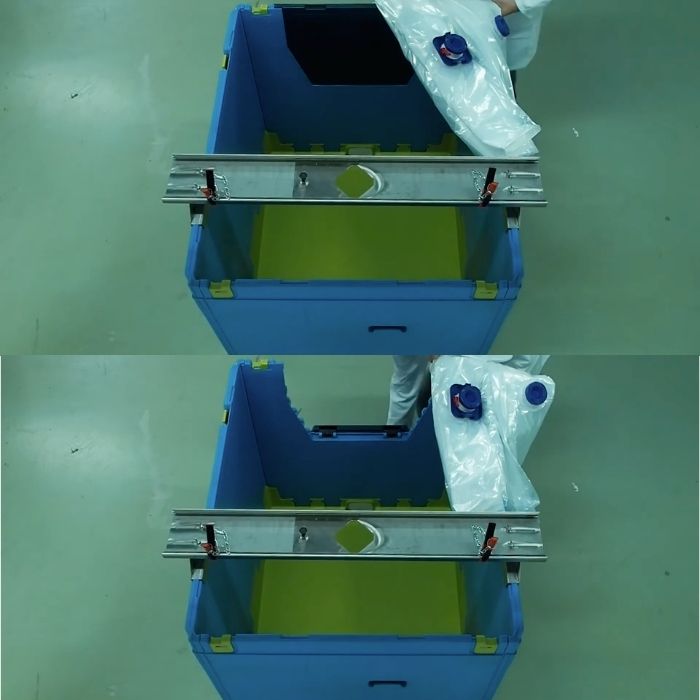
Open the front of the container

Fold open the front side of the blue container. This provides much more room to easily place and position the liner inside, instead of having to work from above into a closed bin.
Watch out for: check that the bridge (the metal frame on top) is loose or easy to remove/move, so you have free access to the inside.

Step 03

Place the liner with the fix clip pointed to the front

Place the liner into the container. Important here: the fix clip (with the valve) must point toward the front of the container, where the bridge and filling opening will be positioned later.

Step 04

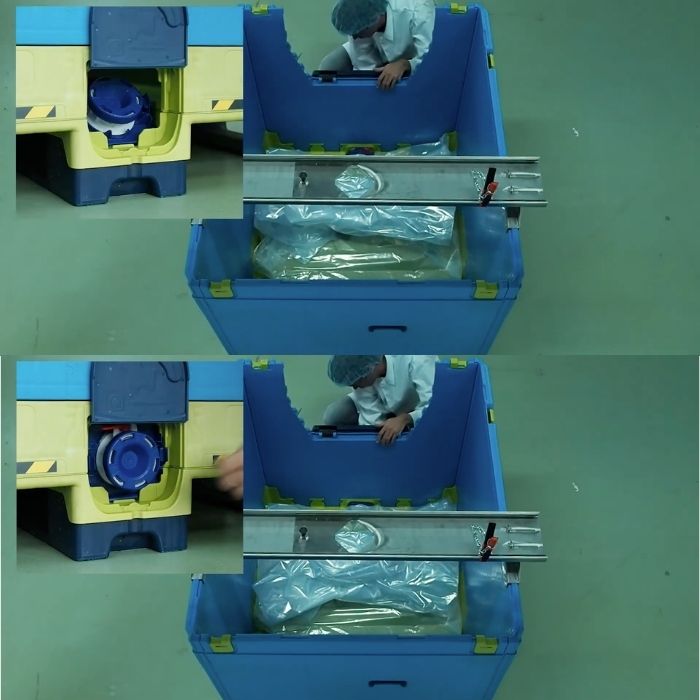
Pull the fix clip into position

Now pull the fix clip firmly into the designated recess at the front of the container (see the close-up: a round blue valve cap clicking into a yellow/blue opening). This anchors the liner to the container itself.

Keep in mind

The clip must fall fully and straight into the recess, a half-clicked clip can come loose during filling.

Step 05

Position the bridge in the centre of the container

Place the metal bridge (the frame with clamps and the filling opening) exactly in the centre on top of the container. The bridge serves as the attachment point for the liner and as a holder for the filling hose.

Keep in mind

A centred bridge ensures an even distribution of the liner into all corners during filling.

Step 06

Fix the filling cap to the bridge

Attach the filling cap (the blue cap with the valve) to the bridge. This is the point where the filling hose will be connected shortly.

Check connection

Make sure that the connection is secure, since pressure will build up here once the filling process starts.

Step 07

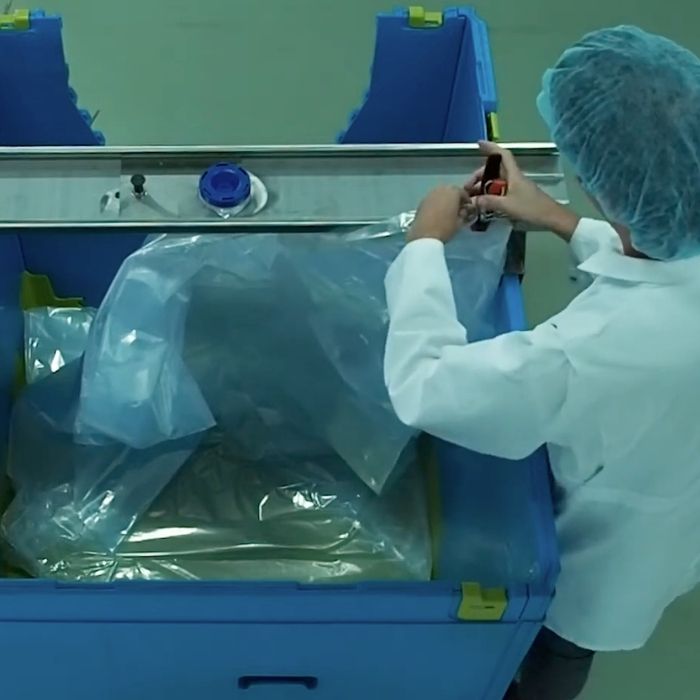
Use the clamps to keep the liner in position

Clamp the edges of the liner with the red/black clamps onto the bridge. This keeps the liner hanging open neatly and in place during filling, instead of collapsing or shifting.

Even distribution

Distribute the clamps evenly across both sides of the bridge for a stable attachment.

Step 08

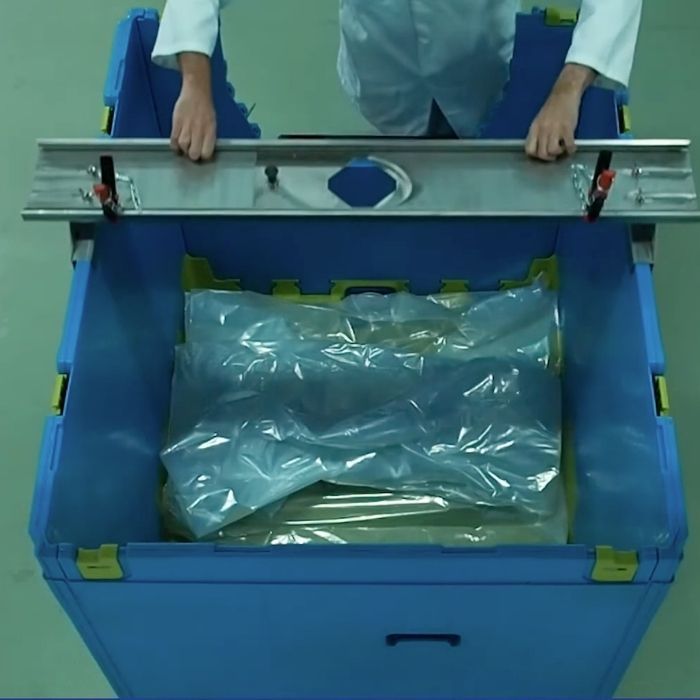
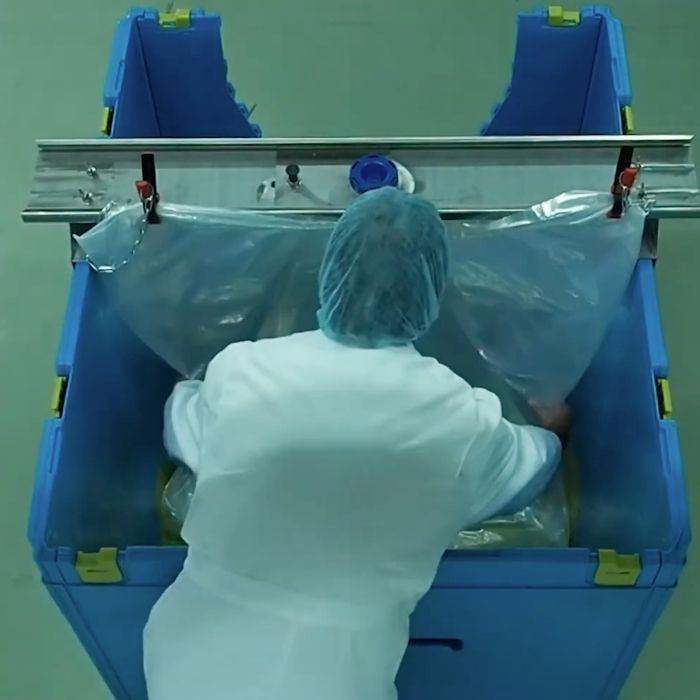
Check if the liner is positioned correctly into all four corners

Push the liner by hand properly into all four corners of the container. This prevents air pockets or folds from forming, which can lead to uneven filling or tearing during the filling process. Take your time here. This is one of the most important checkpoints before filling starts.

Step 09

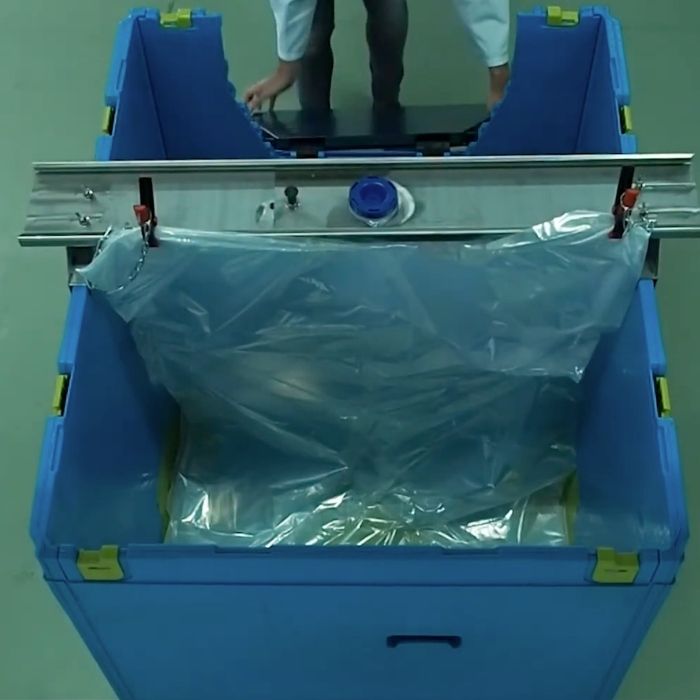
Close the front of the container

Now that the liner is positioned correctly, close the front of the container again. This is the final step before the actual filling can begin.

Step 10

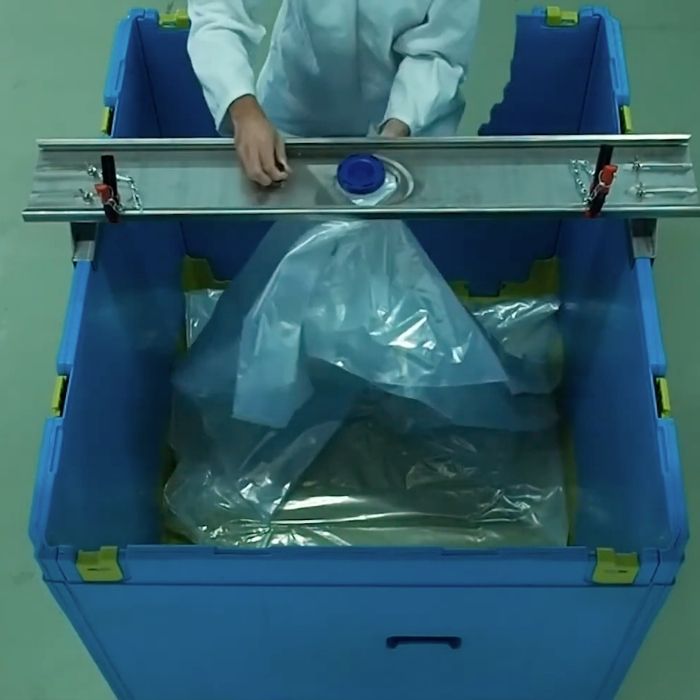
Start filling: the liner unfolds by itself

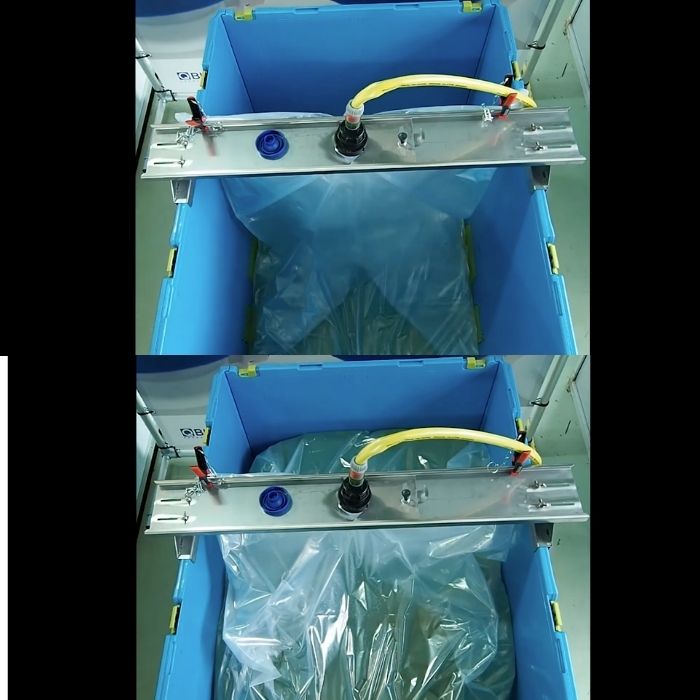
Connect the filling hose to the filling cap and start the filling process. During filling, the liner unfolds on its own and gradually fills the entire container, from the inside out.

Keep an eye out

Keep an eye on the filling process, especially at the start. If the liner isn't unfolding evenly, you can still correct it. Once it's further filled, this becomes harder to adjust.

Step 11

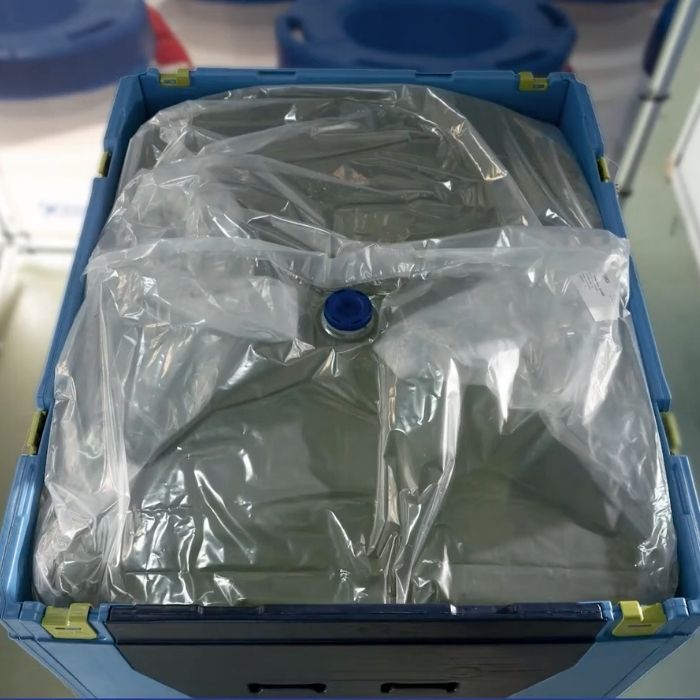
Fully filled T-liner

Once the container is full, you'll see a tightly filled liner covering the entire inside of the container, with the filling cap still visible on top. The liner is now ready to be sealed and transported.

Download T-liner instructions

Enter your email address and one of our specialists will contact you as soon as possible to send you the guidelines.

Conclusion

A correctly installed and filled T-liner ensures a safe, efficient, and reliable solution for transporting liquid and paste-like products. By following the right preparation steps and positioning the liner properly, optimal performance of the IBC system is guaranteed.

Qbig Packaging

Solid liquid solutions

Table of Contents

Free consultation from an expert?

Get in touch with our team to find the best liner setup for your packaging needs. We’re happy to advise based on your process, product, and performance goals.